

Setting up a Shopware automated email takes three things. It needs three things to work. First, you need the right trigger event. Then a valid email template. Finally, a running queue worker. Miss any one of these and no email goes out.
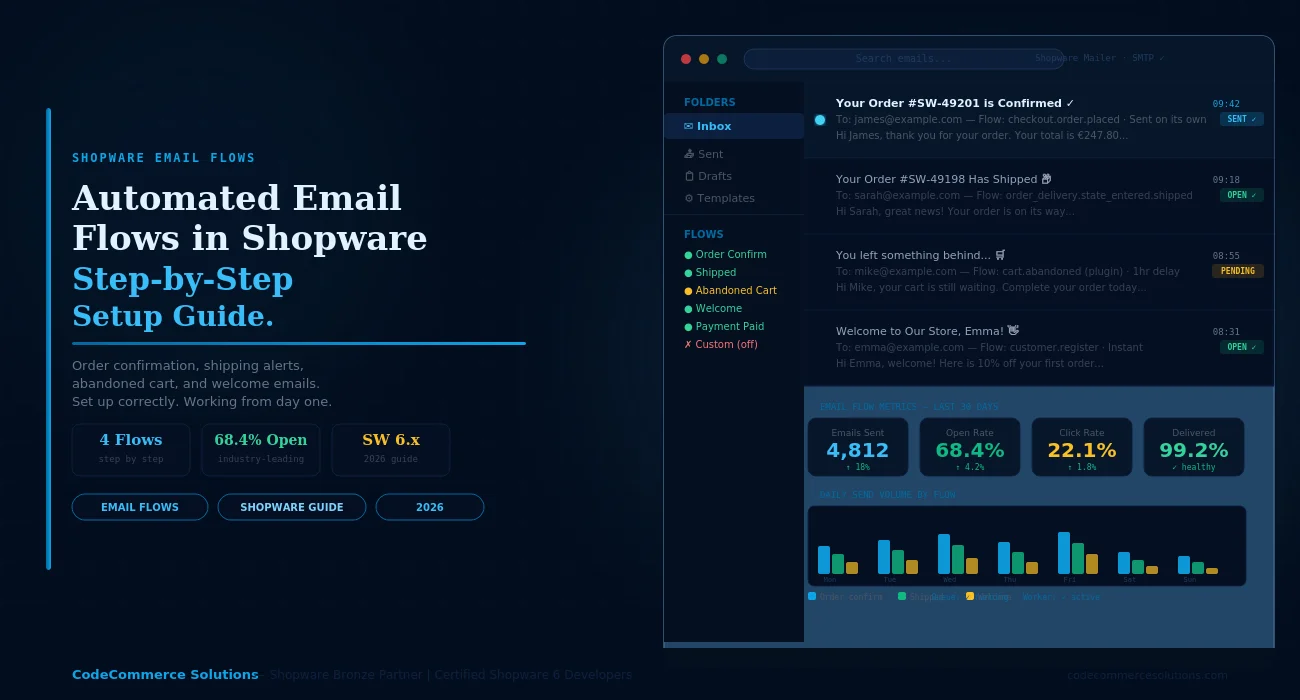
So this guide sets up four Shopware Flow Builder email flows. Each one is a real use case. You can follow the steps exactly and have working Shopware automated email flows by the end of the day.
Before You Start
Run php bin/console messenger:stats first. If the queue shows stuck jobs, fix that before building any flow. A stopped worker means no email flow will ever fire — no matter how well it is set up.
How Shopware Automated Email Flows Work?
By default, Shopware uses the Flow Builder to send all automated emails. Each Shopware Flow Builder email flow has a trigger, optional rules, and actions. The “send email” action is where you pick the template.
When the trigger fires, Shopware adds a job to the message queue. The queue worker picks it up. It checks any rules. Then it runs the actions — including sending the email.
So each Shopware Flow Builder email has three layers. The flow itself. The email template it points to. And the queue worker that runs it. All three must be correct. That is why many setups look fine but still do not work.
Email Templates Must Match the Sales Channel
Each email template in Shopware must be assigned to a sales channel. If your template is not assigned to the channel where the order was placed, the email will not send. Go toSettings → Email templates. Check the sales channel assignment on every template you use in a flow.
Need Custom Shopware Automated Email Flows Built for You?
CodeCommerce Solutions is a Shopware Bronze Partner. Our certified developers build and test Shopware email flows. This includes custom templates, multi-channel setups, and B2B welcome sequences.
Flow 1: Order Confirmation Email
checkout.order.placed
This is the most important Shopware automated email. Every store needs a Shopware order confirmation email. It confirms the order to the customer. It also gives your team a record of each sale.
Here is the exact flow setup. Follow these steps in Settings → Flow Builder.
Trigger: checkout.order.placed — fires when checkout is complete
→ Action: Send email — template: order_confirmation_mail
→ Action: Add order tag — tag: confirmed (optional but useful)
Priority: 100 | Active: ON | Sales channel: All
- ✦Use
checkout.order.placedas the trigger. This is the correct Shopware order confirmation email event. Do not useorder.placed— that event does not exist in Shopware 6 and the flow will never fire. - ✦In the send email action, pick the template
order_confirmation_mail. This template ships with Shopware by default. You can edit it inSettings → Email templatesto match your brand. - ✦Set priority to 100. This makes the confirm email run first. A higher number means higher priority in the Shopware Flow Builder email queue.
- ✦After saving, place a test order on your staging store. Go toSettings → Email templates → Log. Your order confirm email should appear within 30 seconds.
Developer Insight from CodeCommerce Solutions
The most common bug we see: the template is not assigned to the sales channel. The flow runs and the action fires. But Shopware cannot find a valid template for that channel. So it sends nothing. Always check the sales channel assignment first.
Flow 2: Shipping Email
order_delivery.state_entered.shipped
A Shopware email flow for shipping fires when the delivery status changes to “shipped”. Your warehouse team changes this in the order detail screen. Shopware then sends the email on its own.
This Shopware transactional email keeps every customer informed. It reduces support tickets about order status. Set it up once and it works for every order.
Trigger: order_delivery.state_entered.shipped
→ Action: Send email — template: order_delivery_shipped_mail
→ Action: Add order tag — tag: shipped (optional)
Priority: 90 | Active: ON
- ✦The trigger event is
order_delivery.state_entered.shipped. This is a state-change event. It only fires when the delivery status changes to “shipped” exactly. Changing to “partially shipped” fires a different event. - ✦The template
order_delivery_shipped_mailships with Shopware. It includes the order number, delivery address, and line items. Edit it to add a tracking link field if your carrier provides one. - ✦Do not set this flow to the same priority as Flow 1. Use 90. This prevents any execution order conflicts when both flows run near the same time on a busy store.
- ✦Test by changing a test order’s delivery status to “shipped” in the admin. Check the mail log within 30 seconds. The Shopware transactional email should appear in the log right away.
Want Your Shopware Email Flows Built and Tested by Experts?
Our Shopware Bronze Partner team sets up, tests, and monitors email flows for Shopware stores. We cover all four flows here plus custom sequences for B2B, wholesale, and subscription stores.
Flow 3: Abandoned Cart Email
Requires plugin
Abandoned cart emails are not native to Shopware 6. There is no built-in cart.abandoned event. You need a plugin to fire this event. Once the plugin is installed, the Shopware email flow setup is the same as any other flow.
Good plugins for this include: Abandoned Cart by Frosh, or similar plugins from the Shopware Store. Each one adds a scheduler that checks for carts inactive for a set time. It then fires a custom event.
Trigger: cart.abandoned — added by plugin
→ Rule: Customer has email address — guest carts without email are skipped
→ Action: Send email — custom abandoned cart template
Priority: 80 | Active: ON | Delay: 1 hour (set in plugin)
- ✦Always add a rule check before the email action. Check that the customer has a valid email address. Guest carts without an email should be skipped. Otherwise the action fails and logs an error for every anonymous cart.
- ✦Create a custom email template for this flow. Do not reuse the order confirm template. The abandoned cart email has a different purpose. It needs a clear call to action and a link back to the cart.
- ✦Set the plugin’s delay to at least 1 hour. Sending a cart reminder 5 minutes after inactivity feels pushy. 1 to 3 hours is a better window for most stores.
- ✦Test the flow by adding items to a cart on a test account. Then wait for the plugin’s timer to fire. Check the mail log. If nothing appears, check the plugin settings first. The event may not be active yet.
Developer Insight from CodeCommerce Solutions
A Shopware fashion store added an abandoned cart plugin but the Shopware email flow never fired. The plugin was installed but the event was not enabled in the plugin settings. One toggle in the plugin config fixed it. Always check the plugin’s own settings page — not just the Flow Builder.
Flow 4: Welcome Email on Registration
customer.register
A welcome Shopware automated email builds trust from the start. It confirms the account was created. It can also include a first-order discount code or a link to your help centre.
This flow is simple to set up. But it has one common trap for B2B stores — the event name is different.
Trigger (B2C): customer.register
Trigger (B2B): business_events.customer_group_registration_accepted
→ Action: Send email — template: customer_register_mail
→ Action: Add customer tag — tag: new-customer (optional)
Priority: 80 | Active: ON
- ✦B2C stores use
customer.register. This fires on every new account. For B2B stores where customers must be approved, usebusiness_events.customer_group_registration_acceptedinstead. That event fires only after an admin approves the account. - ✦The template
customer_register_mailships with Shopware. Edit it to add your welcome message, brand colours, and any first-order incentive. Keep the email short. One clear message works better than a long one. - ✦For multi-language stores, duplicate the template for each language. Assign each language version to the correct sales channel. A missing translation means the customer gets no welcome email — or gets one in the wrong language.
- ✦Add a customer tag in the same flow. Tag new customers as
new-customer. You can use this tag in future flows to send onboarding emails or targeted offers. It costs nothing to add and is very useful later.
Common Shopware Email Flow Mistakes
These are the mistakes we see most often. Each one causes a Shopware automated email to fail silently.
| Mistake | What Happens | Fix |
|---|---|---|
| Wrong trigger event name. | Flow never fires at all. | Use the exact event from the table above. |
| Template not assigned to sales channel. | Email action runs but nothing sends. | Check Settings → Email templates. |
| Flow active toggle is off. | Flow is visible but does not run. | Turn the active toggle on and save. |
| Queue worker not running. | All flows stop working at once. | Set up worker as a systemd daemon. |
| Two flows with same event and priority. | Unpredictable send order. | Give each flow a unique priority number. |
| Missing email template for a language. | Email not sent for that language. | Add a translated template per language. |
| No rule for guest carts (cart flow). | Errors logged for every anonymous cart. | Add rule: customer has email address. |
Shopware Automated Email: Setup Checklist
- Go to Settings → Flow Builder. Confirm each flow is active.
- Check the trigger event name. Compare it to the correct events listed above.
- Go to Settings → Email templates. Check every template used in a flow. Make sure it is assigned to the correct sales channel.
- Run
php bin/console messenger:stats. Confirm the queue worker is running. - Place a test order or action for each flow. Wait 30 seconds.
- Go to Settings → Email templates → Log. Confirm each email appears in the log.
- Check your inbox. Confirm the email arrives and looks correct.
- For multi-language stores, repeat the test for each language and sales channel.
Why Choose CodeCommerce Solutions?
A Shopware email flow that looks set up can still fail. The template may be there. The flow may be active. But one wrong sales channel assignment or a stopped queue can stop every email. Debugging this without server access is slow.
CodeCommerce Solutions is a Shopware Bronze Partner. Our certified developers set up and test Shopware automated email flows for live stores. We check the full stack — flow setup, templates, queue, and SMTP settings — in one pass.
We also build custom email templates. Your order confirm, shipping, and welcome Shopware transactional emails match your brand exactly. Each template is tested in multiple email clients before it goes live.
Official Documentation
For the full event and action list, see the Shopware Flow Builder developer guide in the official docs. It covers every trigger event and email action.
Get Your Shopware Automated Email Flows Running Today
Start with Flow 1 — the Shopware order confirmation email. It is the most important. Get it working first. Then add the shipping flow. Each new flow takes about 10 minutes to set up once the pattern is clear.
The most common reason Shopware email flows fail is not the flow itself. It is a missing template assignment or a stopped queue. Fix those two things and most flows work on its own.
Need a certified Shopware developer to set up and test your Shopware automated email flows? CodeCommerce Solutions, a Shopware Bronze Partner, handles everything — from templates to queue setup.